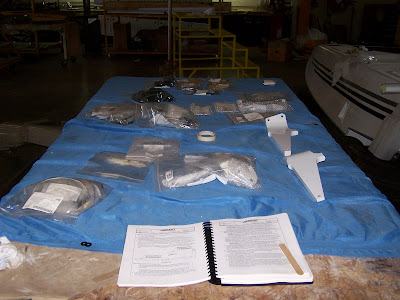
The floats unpacked and ready for assembly.
Getting the spreader bars ready to install.
The "taka taka" - all the parts that come along for the install.
Got 'em pointed the same direction and spreader bars ready to be installed.
The water rudder. This enables the aircraft to be steered while in the water.
Tavasi getting the water rudder installed.
Getting things in position. The floats were "together" and the airplane was being prepped for hoisting.
We have a really nice set of hoisting cables that we used. Cessna recommends using cables at least 60 inches long, so the attach points are not damaged.
Up in the air. Time to get the land legs off!
Sleek! It almost looks like a 210!
Tavasi looks happy with the installation of the ventral fin. This is part of the floatplane modification.
Up in the air! I was on top manning the hoist, while Tavasi is measuring how high we are in the air. We needed something like 72 inches from floor to belly to slip the floats underneath and allow some jiggle room.
Seriously! It looks like a 210 flying through the hangar!
Sliding the floats underneath...you can see we got a little higher than we needed. :)
Myself and Marko getting the front struts installed.
Tavasi drove the hoist while we got all the struts semi-attached.
View from the rear.
Myself and Tavasi discussing the location of one of the cable pulleys. Gotta love the ramen shirt!
Rear steps.
Here's the emergency hydraulic hand pump (front) and the water rudder retract handle (the black thing closer to us), which are located on the floor between the front seats.
The electric hydraulic pump assembly. This is located on the left side of the rear fuselage, back in the tail cone. You can see the empennage flight control cables on the left.
Assembled. You can see the crew steps mounted between the aft and mid struts. Looks good!
Frontage!
So working on the engine is a little bit difficult on floatplanes, since it's so high up. I found a nice long box that the ventral fin came in, and it worked really nice to work off of. I was doing some work on the supercharger in this picture.
Look closely in this picture...what do you see? The gear is retracted! This was my first retraction test...and it worked great! I worked through the gear retractions a few times, trying to work out any bugs. We only had a few small leaks, but everything worked great! Praise the Lord!


Last shot of the day...


1 comment:
looks like fun! We get to change the floats on a 206 next month. Thankfully they aren't amphibious, so they aren't quite as tall.
We have a "float board" for engine work on our 3 floatplanes. Basically a piece of plywood with 2x4s attached for support. It spans the front of the floats, and is plenty strong enough for us to stand on.
Post a Comment